How to set up your first project on music artist manager
Your onboarding is done. Your dashboard is ready. The next step is your first project — and it takes less than five minutes to set up correctly.

Key Takeaways
Create a project by selecting your release type — single, album, mixtape, or EP
The platform generates your initial task list and populates your calendar automatically
Add your track count, release date, and artist profile details before doing anything else
Link collaborators, splits, and your budget from the project settings, not as afterthoughts
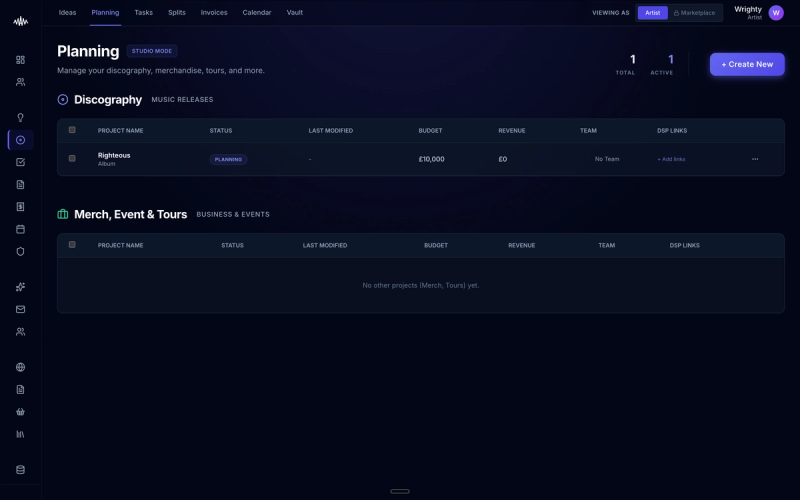
Your onboarding is complete and your dashboard is fully prepared, but a blank workspace can easily lead to scattered assets and missed deadlines. Setting up your first project is the critical next step to centralise your release schedule, budget, and campaign tasks in one secure place. By taking less than five minutes to configure this correctly, you establish a structured foundation for managing your independent music career.
Why this matters
Without a centralised project hub, independent artists frequently lose track of critical assets, mismanage budgets across multiple platforms, and miss key distribution deadlines. Failing to structure your campaigns properly from the outset results in administrative disorganisation, which ultimately dilutes the impact of your music releases.
How to do it
1. Log in to your MAM dashboard and click the "New Project" button located in the top-right corner of the interface.
2. Select an appropriate project template from the drop-down menu, such as "Single Release Campaign" or "EP Launch", to pre-populate your workspace with industry-standard tasks.
3. Enter your project title and set your target release date in the specified date picker field to establish your timeline.
4. Assign an estimated financial limit in the "Budget Cap" field to track your marketing and production expenses automatically as your campaign progresses.
5. Add your primary collaborators, such as bandmates, session musicians, or publicists, by entering their email addresses in the "Team Access" section.
6. Click the "Create Project" button to launch your workspace and generate your automated task checklist.
Tips
• Avoid setting unrealistic release dates; always allow a minimum of four to six weeks to properly coordinate distribution and playlist pitching.
• Use the "Category Tags" feature to colour-code your tasks, making it simple to filter between creative, promotional, and administrative duties at a glance.
• Connect your digital distribution account in the project settings tab to import track metadata automatically and reduce manual data entry.
Next steps
Once your project is created, navigate to the Task Board tab inside your workspace to begin assigning specific deadlines and responsibilities to your team members.
Ready to streamline your workflow?
Stop piecing together spreadsheets and scattered notes. Join the waitlist for Music Artist Manager and get your entire rollout in one place.
Written By
Gavin Alexander
Senior Marketeer
As the founder of Music Artist Manager, Gavin has spent years at the intersection of music and technology. Seeing firsthand how chaotic release rollouts and split sheets can be, he designed a platform that brings major-label infrastructure to independent artists and their teams. He writes extensively about industry trends, artist leverage, and workflow optimisation.